There’s something deceptively simple about a hard boiled egg-just a humble kitchen staple, yet so many fall victim to the dreaded rubbery yolk or stubbornly cracked shell. But what if perfect hard boiled eggs where less about luck and more about science? In this article, we’re peeling back the layers (quiet literally) and unlocking the secrets that transform an ordinary egg into a flawlessly cooked marvel every single time. Whether you’re prepping a fast snack, garnishing a salad, or crafting the ultimate deviled eggs, mastering this culinary classic is easier than you think. Let’s dive in and crack the code to perfection.
Unlocking the Secrets to Perfectly Hard Boiled Eggs Every time
Unlocking the secrets to perfectly hard boiled eggs every time starts with selecting the right eggs and understanding their freshness – a foundational step that transforms an ordinary breakfast staple into a culinary triumph. Whether you’re prepping for an elegant brunch or crafting protein-packed snacks, mastering this art brings a silky yolk and effortlessly smooth whites that elevate any dish.
Prep and cook Time
- Preparation: 5 minutes
- Cooking: 12 minutes
- Total Time: 17 minutes
Yield
- 6 perfectly hard boiled eggs
Difficulty Level
- Easy
Ingredients
- 6 large fresh eggs (preferably organic or free-range)
- Water (enough to cover eggs by 1 inch)
- 1 tablespoon white vinegar (optional, aids peeling)
- Ice cubes and cold water for cooling
Choosing the Right Eggs and Understanding Freshness for Optimal Results
Start by selecting eggs that are not too fresh-eggs aged about 7-10 days peel more easily due to slight pH changes in the whites.Look for eggs with dull shells rather than shiny ones, as these often indicate slightly older eggs ideal for boiling. Always keep eggs refrigerated and gently bring them to room temperature before cooking to prevent cracking.
A quick freshness test: place eggs in a bowl of water-fresh eggs sink and lay flat, while older eggs stand or float. This simple test helps you select the best candidates for the perfect boil.
Mastering the Boiling Process: Timing, Temperature, and Technique Explained
Place eggs in a single layer at the bottom of a pot and cover with cold water, ensuring they’re submerged by at least one inch. Adding a tablespoon of white vinegar softens the shells and reduces breakage during boiling. Bring the water to a rapid boil over medium-high heat.Once boiling, immediately turn off the heat and cover the pot with a tight-fitting lid.
Set a timer for exactly 12 minutes for large eggs-this timing gently cooks the yolk to a creamy, vibrant yellow and the whites to tender perfection. Avoid overcooking,which causes the hallmark green ring around the yolk and a sulfuric taste.
Cooling and Peeling Tips to Achieve Smooth Shell-Free Surfaces
Drain the hot water and transfer eggs to an ice bath immediately to halt cooking and firm up the whites. Leave them to chill for at least 10 minutes. This shock cooling contracts the egg slightly inside its shell, easing removal and reducing moisture loss.
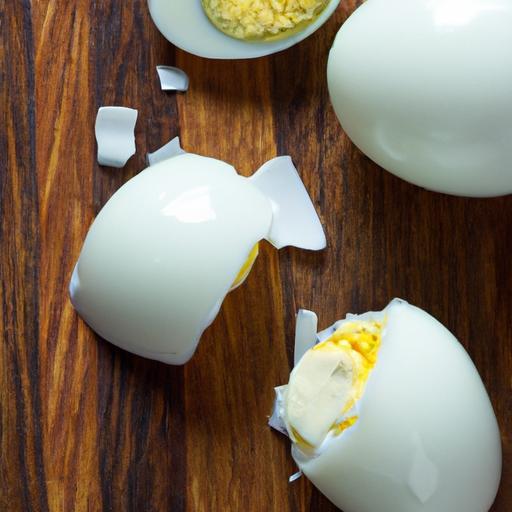
For trouble-free peeling, gently crack the shell on a hard surface and roll the egg with moderate pressure, then peel starting at the wider end where the air pocket resides. Submerging peeled eggs in cold water helps remove stubborn bits of membrane, leaving smooth, pristine surfaces ready for presentation.
Creative Uses and Storage Solutions for Your Perfectly Hard Boiled Eggs
Perfectly hard boiled eggs are wonderfully versatile. Slice and layer them atop mixed green salads drizzled with tangy vinaigrette, mash into creamy deviled eggs tinted with a hint of smoked paprika, or cube and toss into classic potato salad with crisp celery and herbs.For a nourishing snack, pair peeled eggs with crunchy raw veggies and a dash of sea salt.
Store peeled eggs in an airtight container filled with a damp paper towel to maintain moisture, keeping them fresh up to one week in the refrigerator. Unpeeled eggs fare well for up to 10 days. For meal prep convenience, hard boiled eggs freeze best if chopped and incorporated into casseroles or layered dishes.
Instructions
- Prepare your eggs: Remove eggs from the refrigerator 20 minutes before cooking to reduce cracking risks.
- Arrange eggs in pot: Place eggs in a single layer in a large saucepan and cover with cold water by 1 inch.
- Add vinegar: Stir in 1 tablespoon white vinegar to help soften shells.
- Heat water: Bring the water to a rapid boil over medium-high heat.
- Turn off heat: As soon as water boils, cover the pot and remove it from the heat.
- Set timer: Let eggs sit in the hot water, covered, for 12 minutes (large eggs).
- Ice bath: Transfer eggs immediately to an ice bath; cool for at least 10 minutes.
- peel carefully: Gently tap, roll, and peel under cold running water if desired for smooth shells.
- Store or serve: Use immediately or refrigerate in an airtight container.
Chef’s Notes
- For smaller eggs, reduce sitting time by 1-2 minutes; extra-large eggs may need an additional minute.
- If shells frequently crack, try adding a pinch of salt or starting with warm water to stabilize temperature.
- To enhance flavor, steep boiled eggs in a brine of soy sauce and mirin for 2 hours for Asian-inspired variations.
- Make ahead: Hard boiled eggs keep well for snacking or recipes, making them a convenient protein source all week.
Serving Suggestions
Slice your perfectly hard boiled eggs over buttered toast sprinkled with cracked black pepper and flaky sea salt. For more festive presentation, halve eggs and top with vibrant beetroot hummus, chive snips, and smoked paprika. Incorporate them into vibrant bowls-combining grains, roasted veggies, and a soft-boiled egg crowned with microgreens for breakfast or light dinner.

| Nutrient | Per Egg (large) |
|---|---|
| Calories | 78 kcal |
| Protein | 6.3 g |
| Carbohydrates | 0.6 g |
| Fat | 5.3 g |
For more creative egg recipes that transform simple ingredients into extraordinary meals, explore our Delicious Egg Recipes collection. plus, dive deeper into egg freshness and quality on the Unbelievable Egg website.
Q&A
Q&A: Unlocking the Secrets to perfectly Hard Boiled Eggs Every Time
Q1: Why do hard boiled eggs sometiems end up with a greenish ring around the yolk?
A: That telltale greenish-gray ring is actually harmless sulfur reacting with iron in the yolk. It’s a sign of overcooking or rapidly cooling eggs after boiling. To avoid this, cook eggs just long enough-usually 9 to 12 minutes depending on size-and cool them quickly in an ice bath. This stops the cooking process and keeps your eggs looking picture-perfect.
Q2: how can I tell if an egg is fresh enough for boiling?
A: Fresh eggs are fantastic for poaching, but for hard boiling, slightly older eggs actually peel better. If you want to test freshness, place the egg in a bowl of water: if it sinks and lies flat, it’s fresh; if it stands upright or floats, it’s older or spoiled. For easy peeling, choose eggs that are about a week old.
Q3: Is it better to boil eggs starting with cold water or drop them into boiling water?
A: Both methods work, but starting eggs in cold water and then bringing it to a boil gently cooks the eggs and reduces cracking. Dropping eggs into already boiling water shortens cooking time but can led to cracking if not done carefully. Pick your favorite method and be consistent for best results!
Q4: What’s the secret to peeling hard boiled eggs effortlessly?
A: Peeling perfection comes down to a few tricks: first, use slightly older eggs; second, plunge them into an ice bath immediately after cooking; third, gently crack the shell all over and peel under running water to slide the shell right off. The cool water helps separate the membrane from the egg white, making peeling a breeze.
Q5: Can altitude affect the way eggs are hard boiled?
A: Absolutely! At higher altitudes, water boils at lower temperatures, which means your eggs will need a longer cooking time to reach that perfect set yolk. If you live in the mountains, add an extra 1-2 minutes to your boiling time and test accordingly.
Q6: How do I achieve a creamy yolk center rather of a dry chalky one?
A: Timing is everything! Aim for around 9-10 minutes of boiling for medium eggs and adjust for size. Also,don’t overcook-once the yolks have fully set,remove the eggs promptly and chill. This ensures a smooth, creamy yolk rather than that dreaded chalky texture.
Q7: Can I store hard boiled eggs, and how long do they last?
A: Yes! Hard boiled eggs can be stored, unpeeled, in the refrigerator for up to one week. Keep them in a sealed container to avoid absorbing fridge odors. Peeled eggs last only about 2 days, so plan accordingly to keep your snack fresh and delicious.
With these nuggets of wisdom, your quest for the perfect hard boiled egg is well on its way. Remember, practice and a little patience turn eggs from tricky to triumph!
In Summary
Unlocking the secrets to perfectly hard boiled eggs transforms a simple kitchen staple into an effortless delight. With a pinch of timing, a dash of technique, and a sprinkle of patience, you can wave goodbye to cracked shells, greenish yolks, and guesswork. Whether you’re prepping for a busy week, crafting a salad masterpiece, or simply craving a protein-packed snack, mastering this humble egg proves that sometimes, perfection lies in the basics. So next time you boil, remember: the perfect hard boiled egg isn’t a mystery-it’s your new kitchen superpower waiting to be unleashed.